
Using Canva Print Design Tool to Make Print-Ready Artwork
The Canva print design tool is a popular online alternative to professional design software like Adobe Photoshop, Illustrator, or Affinity. Many of our customers choose Canva for its ease of use when creating print-ready artwork—but without the right setup, their final prints don’t always turn out as expected.
In this guide, we’ll walk you through how to make your artwork for printing on Canva, ensuring high-quality results every time. Whether you’re a beginner or an experienced designer, following these steps will help you avoid mistakes like low resolution, incorrect colours, or improper bleed settings.
If you’re new to design, you might want to check out our 10 Graphic Design Tips for Non-Designers before diving into Canva. It covers essential principles that can enhance your designs, making them more visually appealing and effective for print. If you’re planning to design larger prints like posters, be sure to review our guide to standard poster sizes first.
By the end of this guide, you’ll know exactly how to:
- Set up your Canva canvas with proper dimensions and bleed.
- Work with high-resolution graphics, fonts, and colours.
- Export your design in the best format for professional printing.
Let’s get started!
A Little History of the Canva Print Design Platform
Canva was originally launched as an online, free graphic design platform aimed at non-designers.
The goal was to provide easy-to-use design tools for creating social media posts, presentations, posters, and other visuals. It is estimated that today they have over 60 million monthly active users worldwide.
As it was created for screen graphics, we recommend reading through this guide to ensure that you receive high-quality prints from your chosen printer.
This will help if you have just started designing or even if you are a seasoned graphic designer!

Introduction to How to Make Print-Ready Artwork on Canva
Canva is a great online design tool for creating print-ready artwork and files if you don’t have access to professional design software. When using Canva for print projects, it’s essential to properly set up your files for the best outcome.
It’s important to note that this will vary depending on your version of Canva.
If you look at the comparisons below, you’ll see the key differences of what the free version of Canva will let you do compared to Canva Pro.
Canva Free
Keep in mind of the limitations for print production-
Limited template selection
-
No option to save brand kits or styles
-
Limited fonts, graphics, and images available
-
No animation or video editing tools
-
RGB colour mode only (For Screens)
-
Lower maximum resolution on exports (up to 2x)
-
No transparency or background removal
-
No team member collaboration tools
Canva Pro
Recommended for Printing-
Full library of templates for all uses
-
Create and save brand kits with fonts, colours, and logos
-
Access to over 75,000 template graphic elements
-
Animate images and video editing capabilities
-
CMYK colour mode for print projects (For Professional Printing)
-
Higher resolution exports (up to 10x)
-
Remove backgrounds and image transparency.
-
Real-time team collaboration on designs
-
Unlimited cloud storage for images/assets
-
Improved resize options without quality loss
-
Presentation and spreadsheet design features
-
Priority support and training resources
In summary, Canva Pro unlocks much more creative freedom through unlimited access to assets, tools, and advanced customisation features. The collaboration abilities enable working together on branding and designs.
The CMYK colour mode, print-quality resolution exports, and transparency features make it more suitable for professional graphic design work and printable projects.
While you can create artwork with the free version, Pro is recommended for business and commercial uses, marketing materials, print products, and team workflow.
Setting Up Your Canva Canvas and Document
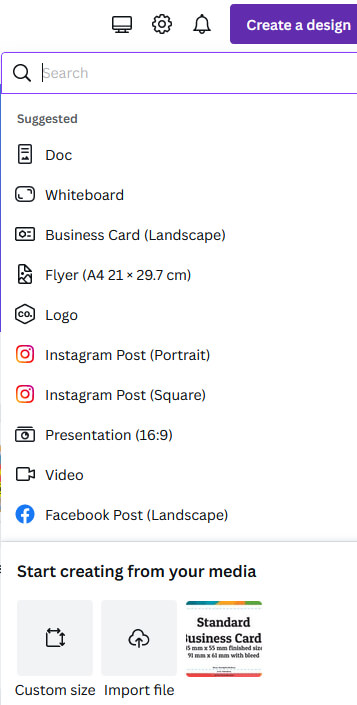
When designing in the Canva print design tool, the first step you’ll want to take is to start by creating a custom canvas size.
This is where you input your desired print dimensions, plus you need to include a 3mm bleed or trim. Doing this ensures proper sizing for print production.
We are not going to go into bleed too much, but it’s where extra space is added to the width and height of the artwork to ensure a great finished product. For those who want to learn more, we wrote an article What is Bleed in print?
To make sure you set up the canvas the right size, all of our products have the measurements needed on their Artwork setup guides, and are the ones called Size with bleed
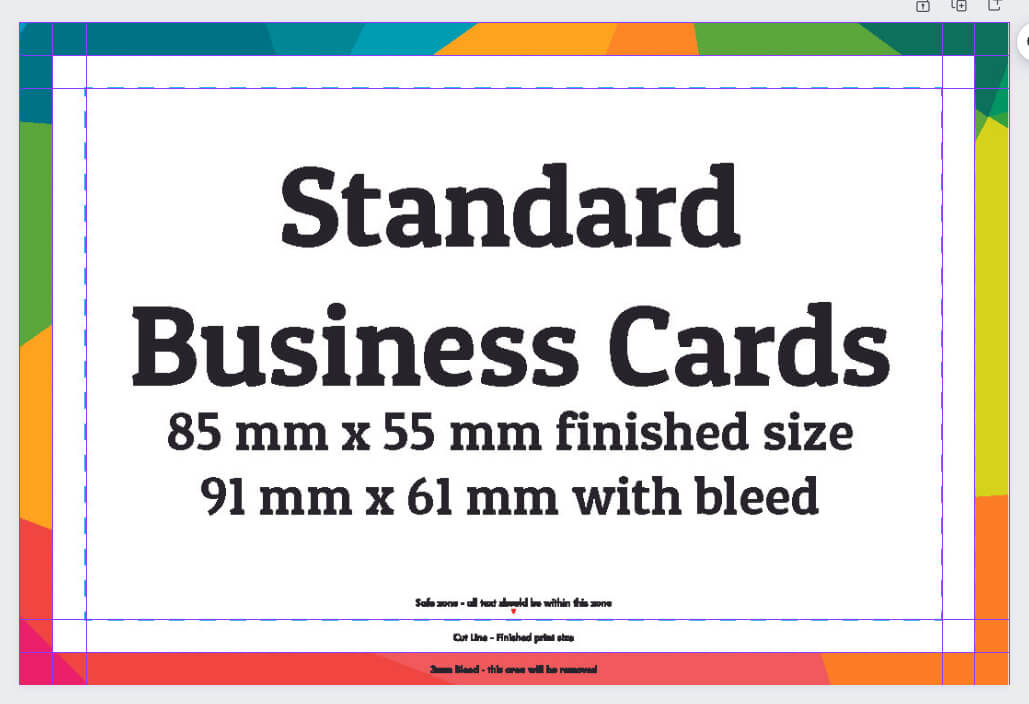
Let us do a Premium Business Card as an example.
You can remove our template file, and the guides you just created will still be there. Don’t worry, they won’t be there on the final print!
Now you are all set up and ready to start designing!
Artwork Setup Guide
Finished Size: 85mm x 55mm
Safe Zone: 79mm x 49mm
Resolution: 300dpi minimum
Format: PDF or JPEG
Fonts: Outlined or Embedded
Bleed: 3mm
So you’ll need to set Canva’s custom size to 91mm x 61mm.
If you’d like an in-depth look at choosing the right dimensions and paper finishes, check out our guide to business card sizes and stocks.
You can then draw a rectangle for 85mm x 55mm and 79mm x 49mm for the Finished size and Safe Zones, respectively.
Need design-specific tips? See our complete guide to designing a business card for layout ideas, font choices, and branding essentials.
Use the alignment tools available in Canva to centre these on the custom canvas.
Using our Free Online Blank Templates with Canva.
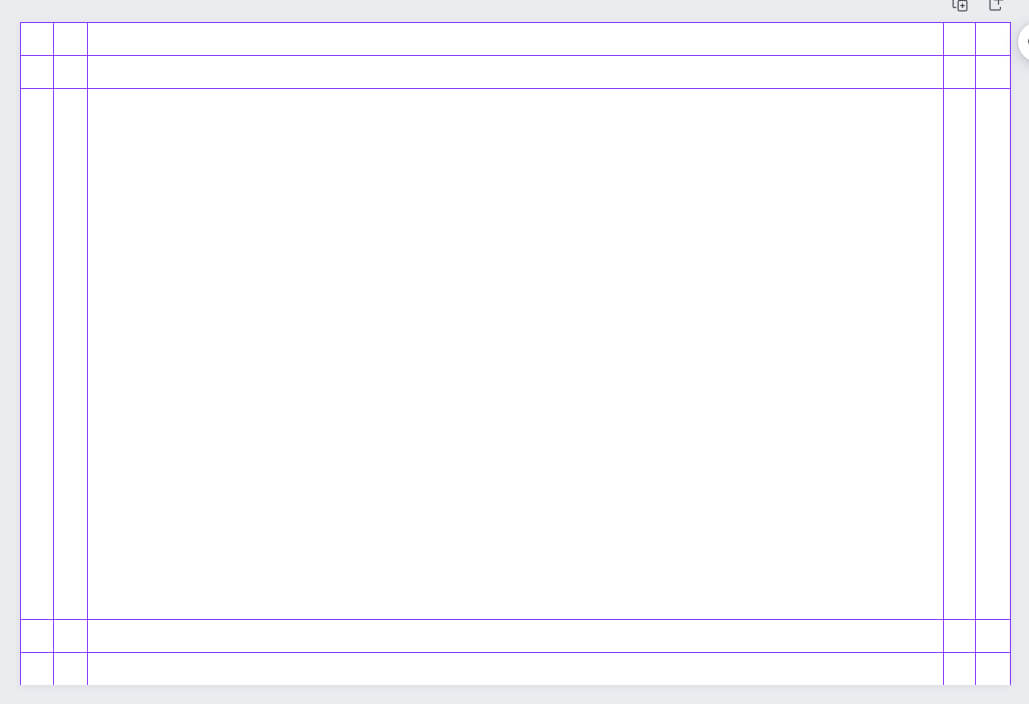
Another way of doing this would be to use our free blank templates available with all of our products. Once you have set up your canvas correctly, you can pull in our blank templates – we would always recommend using our templates when creating files, especially when the design has borders.
Once you have downloaded the templates, you can import the JPG file by placing it into Canva. We would advise that you move our template to the top left corner of your document. Select and drag to the bottom right corner of the image – scaling it up in size until it snaps into place.
Then, if you go to File > Show rulers and guides, you can draw ruler guides to get the safe, trim, and bleed lines on your document, aligning the guidelines with the ones in our template.
Working With Graphics in Canva
Use high-resolution, print-quality images. High-quality images are images of 300 dpi, and it’s what we would use for a great design.
Low-resolution graphics will decrease the quality of your prints. Convert any vector shapes to outlines before exporting your Canva design.
Avoid thin lines and small text, as it can be hard to print. Make sure fonts are embedded or converted to outlines.
Setting up your Canva canvas properly is a small step that makes a big difference in print quality. Once your document is ready, you can move on to designing—just be sure to check out our Great Guide on How to Make Your Leaflet Design Stand Out for tips on layout, colours, and typography.
Using Colour in Your Canva Designs
When designing for print in Canva, understanding how colours translate from screen to paper is crucial. Canva defaults to RGB colour mode, which is ideal for digital designs but can lead to unexpected shifts when printed. Most professional printers, including us, require CMYK colour mode for accurate colour reproduction.
Colour choice is even more critical if you’re designing marketing materials or leaflets. If you plan on creating promotional flyers soon, don’t miss our ultimate guide to creating an eye-catching flyer design for tips on colour harmony and layout.
Not sure why this matters. Our guide on What’s the Difference Between RGB and CMYK? Explains how colour modes affect print quality and how to avoid common mistakes.
Key Colour Considerations for Print
Expect Colour Shifts – Bright, neon, or very dark tones may not print exactly as they appear on screen.
Preview in CMYK (Canva Pro Feature) – If you have Canva Pro, you can switch to CMYK mode for a more accurate preview.
Use Muted, Print-Safe Colours – Vibrant RGB shades may appear duller in print. Adjust accordingly for the best results.
Colour choice is even more critical if you’re designing marketing materials or leaflets. The right palette can enhance readability, brand recognition, and overall impact. For tips on creating eye-catching print designs, check out our Guide on How to Make Your Leaflet Design Stand Out.
By understanding how Canva handles colour and making the right adjustments, you can ensure your final prints look exactly as intended.
For brand consistency across all your stationery, you can even create letterhead designs in Canva. If that’s on your to-do list, see our tips on how to design a letterhead to maintain a professional look—or dive into the essential elements for company letterheads for a thorough checklist.
Fonts and Canva
Canva has a huge selection of web fonts, such as Google fonts – these can help your designs look awesome. However, there is no way to outline or embed fonts in the Canva print design tool; as such, we would recommend clicking the option to flatten your pdf.
Usually, when submitting artwork, we would ask that you either embed fonts, outline them or ‘convert text to curves’.
Exporting and Finalising Your Canva File
Export as Print PDF with bleed crop marks when you are ready to print from Canva. For the best resolution, avoid flattening transparency if possible.
If you’re scaling your design up to poster size, also check out our easy steps on how to make a poster for print to ensure the correct resolution and layout.
Review resolution, outlines, colour, margins and text size. When you download your file, it is always best to ensure it’s print-ready before submitting it.
Retain vectors when doing cutlines. Rasterising converts to pixels with lower resolution.
Still unsure if your file is truly print-ready? If you’re debating between handling this yourself or getting expert help, check out our guide on 5 Excellent Reasons to Use a Professional Designer vs. Doing It Yourself to make the best choice for your project.
Now Go and Download Your Files!
Your Design is done, so it’s time to download it!
Click on ‘Share’ in the top right, and a menu will appear.
Then you can click on ‘Download’ and select the ‘File type’ menu. You’ll want to select ‘Print PDF’. Select the checkboxes ‘Flatten PDF’ and ‘Crop Marks and Bleed’ too. This converts your design to a raster image, which means we can’t edit – but you can, as your design will be saved within your Canva account.
Send us your downloaded PDF, and we will check it over!
Additional Canva Tips
Take advantage of fonts in Canva and colour libraries. Upload your branding for a consistent look.
Resize, rotate, or layer images as needed. Canva simplifies editing graphics and photos.
Let us know if your design was created in Canva. We can then check that everything is right and optimise for any print issues.
With proper setup, Canva can work great for print! Follow these tips for the best results.
Finally, the key takeaways when using Canva for print design are to set up your canvas with proper bleed, use high-resolution printable assets, choose fonts wisely, review colour shifts, and export with the best settings for print production.
Following the steps outlined in this guide will help you create stunning Canva designs optimised for professional printing. With some thoughtful preparation, Canva can be a powerful tool for print projects and visual assets. Just keep these best practices in mind as you bring your vision to life with Canva’s easy-to-use creative platform.


